Description
- Brian Crower High Performance Stage 2 Cams for 2022-Up RZR Pro-R (4 Cylinder) models
- These cams showed 10rwhp peak gains, and 6-7rwhp max gains
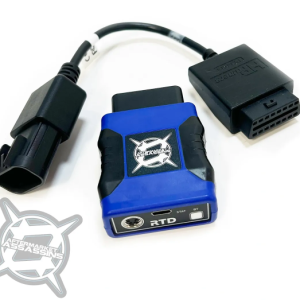
- Use these cams with our exhaust, clutch kit, and Level 3 tune. Cams can be run with our Level 2 tune if you already have it. However, hot starts are an issue with these cams and the Level 2 tune. Our Level 3 tune is suggested with these cams as it fixes hot starting, has better low end, and slight peak RPM fueling adjustments. **Note: For Level 3/cams We HIGHLY recommend upgrading to the HP Tuners RTD. While our tunes have been proven to work great with our shop vehicle and many others, some may have idle issues that need a revised tune. Higher lift camshafts are very finicky at idle. If you were to have idle issues, with the HP Tuners RTD we can deploy revised tunes quickly and easily whereas with a simple ECU flash that is not an option – you would need to send your ECU back for a reflash.
- Cams allow the vehicle to rev higher where the OEM cams fall off. While these cams still make great torque/power down load and all around, they are especially good for those riding in the dunes and wanting to clutch for 8500-8600 RPM. The increased wheel speed helps in many situations, but again, dune riders will really benefit from the added RPM/wheel speed.
- Others have tested these same cams and claim bigger gains. We are showing our honest dyno numbers, and we are very consistent/particular on how we dyno these vehicles. Others are showing gains at a higher RPM, and have inconsistent results. Running over 8600 RPM will result in extra belt heat, and alternator issues. This motor with these cams will make a little more power at 8800-8900 RPM, but if the rest of the vehicle/parts are not going to last, we simply won’t show gains at that RPM.
- Cams are “drop in” which means that 95% of the time they will bolt in without having to shim the valves differently. Keep in mind if your vehicle has a good deal of miles on it, and in rare cases, you may need to shim. We always suggest checking your valve clearance after installation and keep in mind it may take a few days to order in new buckets/shims. This procedure along with cam removal/installation is in your service manual.
- For installation we suggest referring to your service manual. Quick rundown of installation: Remove bed, loosen airbox bolts, remove bed support (may need to loosen plastics), remove ignition coils and breather hoses, remove valve cover, remove 1 bolt from the tensioner cover (it’s blocked when at top dead center), set motor at top dead center (align marks on cam gears & bottom alternator pulley), pull chain tensioner, pull cam caps (loosen evenly), install AA cams, check valve clearance. Now you are ready for assembly in the reverse order.
- Dealers: No dealer margin
- PN: 112-1039


